[NOTE: this is an update of an earlier post. ] When you move into your dream home, you’ll finally have enough closet and storage space, and you'll organize and store everything, and it will stay where it belongs, right? Wrong. Without designing enough storage space into your new home, letting go of what you no longer need, and finding smart ways to organize what you keep, you could end up with a mess of unused, unorganized stuff taking over parts of your new house like the alien amoeba in the classic horror film, The Blob. To avoid this sad fate, Kirsten Ederer Lytle, NCIDQ, interior designer and LEED green associate at The Onyx Group in Alexandria, Virginia, has lots of creative tips to help busy families turn organization dilemmas into storage solutions. As spring begins, there's no better time to start taking control of your living environment.
1. Finish unfinished spaces. Don’t let unfinished parts of your new house become a dimly lit, poorly organized catchall for unused stuff. “Finish these areas to a basic level, install utility shelving, and organize from there,” Lytle says.
2. Keep out what you need, and pack away the rest. Once that’s done, storage spaces like pantries, linen closets, and mudrooms can serve their true purpose—organizing things you use on a day-to-day basis.
3. Be closet savvy. Make sure that your master closet is big enough to be useful.
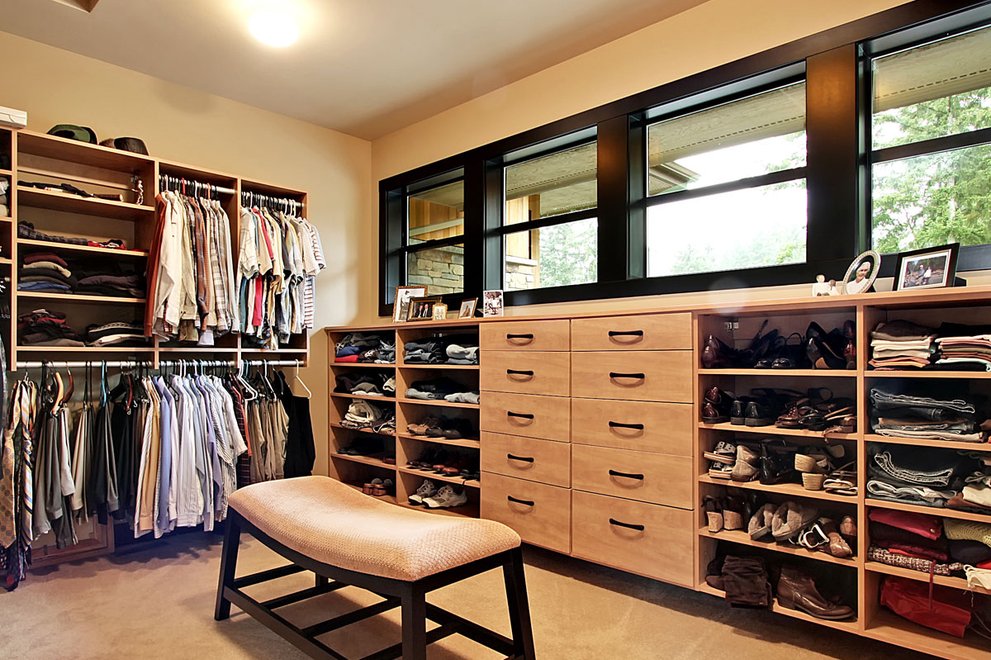
Natural light is also a bonus for a good walk-in closet, as shown here in Plan 132-221
According to Lytle, the ideal dimensions for a master bedroom walk-in closet include 2 ft. for typical hanging space, 12 to 15 in. for shelving, 30 to 36 in. of depth for drawers (including space to pull out the drawers) and a 24- to 30-in.-square minimum in which to stand (although more space for movement is desirable). FYI, reach-in closets, which are typically 2-ft.-6-in. deep and at least 3 ft. wide, are actually more efficient in terms of square footage because you don’t need space to stand.
This savvy home office occupies a closet that can be closed off to hide clutter. Design by architect Cathy Schwabe, Plan 891-1.
4. Think out of the box. Try accessing unused spaces to create extra storage. “I love building shallow shelves between studs in inter-wall spaces and building drawers into otherwise unusable crawl spaces,” Lytle says. “It feels so sneaky and efficient!”
Building in a desk and overhead cabinetry made this alcove more useful. Design by architect Bud Dietrich, Plan 481-7.
A simple built-in desk by architect Cathy Schwabe unclutters one corner of a bedroom. Plan 891-3
A roll-out drawer for toilet paper is a clever storage solution for the bathroom. Design by architect Sarah Susanka, Plan 454-12. Add storage and display to the stairway, either under it or along it,
as shown in Plan 573-1 by SALA Architects.
5. Organize by size and color. Put soft, large items up high; heavy, large items down low; and small items at eye level. Lytle also suggests grouping similar colors together and arranging items from lightest to darkest or lightest to heaviest (for clothing). “Organizing by color or shade helps your eye sweep in a particular direction and adds memory triggering for your brain,” she says.
6. Make storage attractive. Repurpose vintage or industrial items (like old ladders, egg baskets, etc.) for storage. Create a wood built-in and paint it with an accent color or add wallpaper to the back for extra pop. Buy storage containers with colors and patterns that compliment your décor, and add a few natural wicker baskets and wood chests for a sophisticated, timeless look. Avoid plastic anything if it’s visible in the room. And in utility areas (think your garage or basement), use clearly labeled bins, and store them in a well-lit place.
This mud room/laundry makes storage attractive with coat hooks and shoe and boot cubbies below lined wicker baskets. Plan 928-13. Under eave storage is a practical way to add efficiency, as here in
a top floor home office of Plan 927-5 with built-in shelving and wide, bureau-like drawers.
7. Purge. Separate your unused items into recycle, trash, and donation piles, and then follow through by actually getting rid of them.
8. Go digital. There is no excuse to not go paperless these days—just make sure to have secure backup.
9. Hide it if it’s ugly. “Pet peeves of mine include large collections of DVDs, CDs, records, video games, or magazines,” Lytle says. Unless they are very artfully arranged or have particular aesthetic value (think vintage LP artwork), Lytle suggests storing these items alphabetically (or by genre) in decorative boxes (or behind closed doors) or digitizing them and getting rid of the originals.
10. Go clutter-free. The first sign of a dated home is knickknacks, picture frames, piles of papers, toys, and miscellaneous junk cluttering surfaces. Find a home for it, or get rid of it.
11. Label it. Create attractive labels for your storage containers, label things specifically (never miscellaneous!), and don’t put items in a bin that don’t fall under the label.
12. Store things near where you use them. It makes putting things back in their proper place much easier and helps you maintain the organizing and storage system that you worked so hard to set up. And finally, include your family in the process. Ask them to help organize and store things using the new system. Show them where their things are, where to put them away, and try to help them have fun with it. Your family may not always follow the system perfectly, but any effort they put in helps.


